Tuesday, November 16, 2010

Melbourne Regionals

I'm back.  I know.... two days in a row - don't faint!!

As promised, today I have some photos of a few of the swaps I received from some of the very talented Stampin' Up! Demonstrators who were at Melbourne Regionals on Saturday.

As you can see, I received quite a few swaps.

This is the card I made to swap.  It's intended to be a male Valentine's Day card, but could also be used for his birthday, anniversary etc.

Of all the swaps I received, this was my fave.  It was made by Leanne Spalliera.

And here are some others which are just gorgeous:


Unfortunately this swap didn't have a name with it, but isn't it gorgeous.

Donna Holmes

Rachel Woolard

These next two cards were made by my two gorgeous downlines:

Heather Tiley


And there were even swaps which weren't cards.

This little milk carton has some choccies in it (can you believe it - they are still in there after 3 days??)  Glyn Savage

Sherbet in this one....thanks Amanda Baker

Kaylene Schultz (guest) and Kimmy Meiklejohn

I have many other beautiful swaps, just too many to photograph.  It was a great day at Regionals which I thoroughly enjoyed.

Monday, November 15, 2010

Christmas Wreaths

Sorry I haven't posted for a little while.  Busy with Chrissy "stuff", Regional swaps and work.

I have a couple of Christmas wreath cards to show you today.  Now..... I can't take full credit for these cards as I've seen variations of them on other blogs.  I love surfing the web and looking at what other talented Stampin' Up! Demonstrators create.

This first card uses an old fave stamp set of mine - Pocket Silhouettes.  I've used Old Olive and Pear Pizzazz ink and created the berries with red Fine Galaxy glitter.

This next card took a littler longer to create - okay, a whole lot longer to create.  To save a bit of time I'm quite sure I could have punched out less leaves and it would look just as good.  The leaves are punched from the two-step bird punch and the berries were punched from the two-step owl punch.

They're cute aren't they?

I attended Melbourne Regionals on Saturday (a seminar for Stampin' Up! Demonstrators) and can't wait to show you some of the fantastic swaps I received.  I'll be back shortly with some photos for you to drool over.........

Thursday, October 21, 2010

Dress Up Christmas

Stampin' Up! have come to the party again and have got something special for all of us to enjoy.

During the special promotion period - 16 October-30 November 2010 - you can earn exclusive Stampin' Up! ribbon spools in two different ways:

1.  Purchase a gift-giving bundle and receive one FREE spool of ribbon
2.  Host a $550 workshop and receive a FREE spool of ribbon.

Bundles are as follows:

Gifted Bundle:
Gifted set and Jolly Holiday DSP
Item No: 124041 $66.90 - wood mount
Item No: 124042 $56.90 - clear mount

Welcome Christmas Bundle:
Welcome Christmas set and Christmas Coca specialty DSP
Item No: 124045 $69.90 - wood mount
Item No: 124046 $59.90 - clear mount

Season of Joy Bundle:
Season of Joy set and So Swirly Stampin' Around wheel
Item No: 124043 $67.90 - wood mount

Delightful Decorations Bundle:
Delightful Decorations set and Ornament punch
Item No: 124044 $72.90 - wood mount

Simple email or phone me to place your order of one of the above mentioned bundles and you can choose from a selection of four FREE ribbon spools.


There are no limits to the number of bundles you can purchase.  For every bundle you purchase, another spool of ribbon you may choose.

Please remember that bundles and free exclusive ribbon are only available while supplies last.

Imagine how gorgeous your gifts will look under the Christmas tree this year - wrapped and tied with gorgeous Stampin' Up! accessories.


Monday, October 18, 2010

Owls In Love

I just love the two step owl punch.  He is such a versatile little bird and can be used for both male and female cards.  Here I've used it as a "love" card - valentines day, wedding, anniversary or even a birthday card for your other half.  

In hindsight I shouldn't have used Early Espresso card stock as the background colour behind the owls because they were punched from Early Espresso too - but I'd stuck them down before I realised that the birds were lost a bit in the background - hohum - next time I'll do it different.  Besides that, I really love this card.  Soooooo cute.

If you want the instructions for making this card, please drop me an email.

Saturday, October 16, 2010

Man Overboard

One of my very good friend's son recently celebrated a birthday.  William loves the beach and so I wanted his card to have a fun beachy feel.  This is what I came up with.......

I've used the Bigshot and Timeless Type Junior Alphabet dies to create William's name.  After each letter was glued into place I marked the them with my white gel pen.  The clouds were sponged with white craft ink, as were the tips of each of the waves.  The gel pen was also used to create a few water ripples.  I'm not overly happy with the sun, but that was sponged too and then I used a marker to create the rays (hmmmmm - there has to be a better way to create a sun (lol)).  

Apparently it's William's favorite card and he's (very generously) displayed this card at the front of the all of his other cards (yes, I'm honored!!)

Happy 6th birthday William!

Scraps of DSP

Use up your scrap pieces of designer series paper!

This is a fantastic way to use up those long strips of designer series paper you have lying around your desk.  The original idea for the design of this card was taken from one of the gorgeous cards on the front of the 2010-2011 Idea Book and Catalogue.

I've punched strips of dsp with the Eyelet Border punch and glued the un-punched edge (does that make sense?) of the dsp strips to a piece of scrap card stock.  Once the card stock was fully covered with the strips  I ran it through the Bigshot with the Top Note die.  I then ran my hand backwards over the scalloped edges of the dsp to lift the scallops off the page.

I'm really happy with how this card turned out - it's very "pretty".

Don't forget to use your Stampin' Up! catalogue for creative ideas - hopefully you'll find some fantastic inspiration just as I have.

Wednesday, October 13, 2010

Christmas Stamp-A-Stack


Last night I held my Christmas Stamp-A-Stack class - we made four cards and four Christmas tags.

This first card was made using the Delightful Decorations and Lovely as a Tree (one of my favs) stamp sets.  We punched out the Christmas ornaments with the Ornament extra large punch and tied a piece of linen thread around the top of each one and added a dimensional to the back of them to give lift them off the tree.  The Cherry Cobbler ornament has a rhinestone added to the centre of it to add a bit of bling - you know I love bling!!

This next card is a favorite from last year.  The original card idea came from a swap I received from one of the very talented girls in a Stampin' Up! group that I belong to (I have misplaced the original swap, so if you were the talented girl, please let me know and I'll add your name here).  Anywho.... this card was popular last year, so we made it again this year.  The stamp set is (again) Lovely as a Tree and there is glitter glued to the "window frames" to look like banked snow.  The sentiment is from Many Merry Messages - this stamp set covers all your sentiment needs for Christmas - love it!!

We then made four Chrismas tags using the Punch Pals stamp set.  All the images were stamped with StazOn black ink and we then coloured the images with markers.  How gorgeous will these look on gifts under the tree??

 If you are interested in attending my classes, please give me a call or drop me an email.


Sunday, September 26, 2010

Christmas Stamp-A-Stack


I hate to scare you all to death......... BUT CHRISTMAS IS JUST AROUND THE CORNER!!  

Now is the time to think about how many cards you need to make and to start ordering your supplies, and then..... start making them.  At my Stamp-A-Stack class this month we are going to start our Christmas cards.  Please give me call to book your spot if you'd like to attend this class.  Click on the tab at the top of this page to view class dates and times.

Cards in the Spotlight

At this month's Technique Tutorial we made cards using the spotlight technique.  This technique is supposed to look like you are shining a light on to part of a stamped image to "light it up" - like it's in the spotlight.

Do you think we achieved this?

This first card uses the gorgeous hydrangea stamp from the the level 1 hostess stamp set Because I Care.

Here's a close up of the spotlight technique:  This image was coloured with blender pens and ink from the fantastic selection of Stampin' Up!'s stamp pads.

For the second card we used another gorgeous stamp set, Elements of Style.  I think I'll be using this stamp set for several more techniques so I hope you like it as much as me....

And here's another close up of the technique:  This image was coloured with markers.

At October's Technique Tutorial we'll be learning colouring with watercolour crayons.  Click on the classes tab at the top of this page for class dates and times.

I (FINALLY) used my brand new owl punch today, so stay tuned for some cute owl cards in the near future.

Friday, September 24, 2010

5 Petals

Have you noticed a bit of a theme with my cards lately?  I'm loving flowers with leaves!

I whipped up these cards on Monday - okay, I wish I had just whipped them up - it took me all day to come up with these designs (my mojo is returning - but slowly (lol)).

I wanted to create four cards using a similar style.  What do you think?

The flowers have been made using the 5-petal flower punch.  I punched 4 flowers for each card and rubbed the top of each flower roughly with my stylus.  

Each of the cards have been made on very vanilla and riding hood red card stock.  For this first card I ran the  top note shaped card stock through the polka dot embossing folder.   


I used the top note die and the manhattan flower embossing folder on very vanilla card stock for this card.
 

The next two cards use the scallop circle die with the same embossing folders.

I cut the base of this card down a little to make it more square.

I've also used the colour spritzer tool and spritzed black ink onto some of the flowers.  What do you think of the striped grosgrain ribbon?  I really like it - it's old olive, so of course I like it (lol).  I also like the large 3.2cm width - it adds a great dimension to the cards.

If you have any questions about how these cards were assembled, please don't hesitate to email me with your questions.

Wednesday, September 22, 2010

A Card For Dad

Here's a card I made for my Father-In-Law.  I always struggle making cards for men (why don't they like pink and flowers??).  After looking through my stamp sets I once again pulled out my trusty Lovely As A Tree set.  How great is this set for masculine cards?

The base of the card is Kraft card stock (retired) which I've stamped the leaves onto with Chocolate Chip ink.  I used my Big Shot and the Timeless Type Junior Alphabet dies to create the letters for DAD from Chocolate Chip card stock.  I added Crystal Effects over the top of the letters to give them a glossy finish (after I assembled the card).

I cut a square of Chocolate Chip and Soft Suede card stock and layered on top of each other.  I added some twine to create the squares and button embellishments (not all Stampin' Up!).  I also used one of the leaves from Leaves #2 Originals Die for the Old Olive leaf - I scratched the leaf's veins into the card stock with my paper piercer and then sponged with Soft Suede ink.


Overall, I was very happy with the card.  Happy Birthday Kev!!

Saturday, September 18, 2010

A Change to Class Days

I will no longer be able to hold classes on Fridays due to having swimming lessons - yes, that's classes for me - not my children.  Unfortunately, the only day the swim school can fit me in for a lesson is Fridays.  So after discussing with my regular bunch of stampers, I've changed my class times to Tuesday evenings at 7:30pm.

Stamp-A-Stacks will now be held on the 2nd Tuesday evening of the month and
Technique classes will be held on the 4th Tuesday evening of the month.

October classes are as follows:

Stamp-A-Stack - October 12th, 7:30pm.  The class will be themed for Christmas
Technique class - October 26th, 7:30pm.  Watercolouring with crayons

Please remember to RSVP two days prior to classes so that I can cut up card stock for you.

Hope to see you at a class soon.

A Blooming Quick Card

You know how sometimes you need a card in a hurry (because you've let your stash run low)??  Well this is a super quick and easy card to make.  The stamp is from the Eastern Blooms set which I recently acquired.  I've been borrowing my Sister-In-Law's set (thank's Trace) and thought it was probably time I got my own.

I stamped the image in black StazOn and punched out Riding Hood Red flowers from the Trio of Flowers punch - which has now been retired, but the small flower from the Boho Blossoms punch or Birds and Blooms Sizzlits Die would work just as well. I fixed the flowers in place with a black brad.

I then stamped the sentiment at the base of the flower and added a sprinkle of Dazzling Diamonds to the centre of the remaining flowers.  Layered it onto some card stock and - whalla - done!  How simple is that?

I hope you all have time to do some stamping this weekend.  Family permitting, that's what I'll be doing.  I think I've found my mojo again (AT LONG LAST!!).

Wednesday, September 15, 2010

Hydrangeas

I've seen a couple of these hydrangeas recently and decided I had to have a go at one.  Thankfully, I found a video which the very talented Valita Reynolds (a Stampin' Up! Demonstrator) placed on You Tube.  

The flowers are made with the large heart punch.  I love the fact that you can use your punches to make all sorts of different things besides punching the obvious shape of the punch. 

This is my take on the hydrangea and the card I made for it.  What do you think?

Here is a close up shot of the hydrangea.  I placed white brads in the centre of my flowers, but you can also place a circle of coloured card stock in the centre of each flower, as shown in Valita's video.  

I also did my leaves a little different.  I ran the paper piercer down the centre of each Old Olive heart and scratched veins into the card stock with the piercer.  I then sponged Old Olive ink onto the leaves.  I was happy with the end result. 


Tuesday, September 14, 2010

Cracked Glass Technique Class

I thought I'd show you the cards we made at last month's cracked glass technique class.  First off, a female card:
Sorry, the photo's aren't fantastic, so I'm not sure if you can see the cracked glass effect.  The girls who did the class each coloured their butterflies in different colours and they all looked great.

And here's one for the boys:

They all crack differently, so it's always interesting to see how they turn out.
At this months class (which is being held this Friday (17th) we are doing the spotlight technique.  I'll post some pictures of the cards we make next week (I'd better go and design them (lol)).

Thursday, September 2, 2010

September Classes

Please note the following dates for September classes:

September 10th - Stamp A Stack
September 17th - Technique Tutorial (original date was 24th, but brought forward because of school holidays)

Please click on the Class Calandar tab at the top of this page for all class details.

Hope to see you at one of these classes.

Hip Hip Hoorah

I'm celebrating for three reasons...


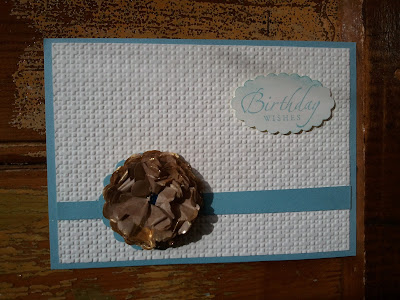
1.  I've just had a BIG birthday which I celebrated in style.  Thank you to everyone who sent gorgeous cards and for the lovely messages.

2.  In the mail yesterday I received some more memory for my computer (hence the reason for my lack of blogging lately - it was taking over an hour just to switch between programs - grrr).  Now I'm running at top speed so there's no stopping me now.

3.  And this is super....

Release of the 2010-2011 Idea Book and Catalogue

The new 2010-2011 Idea Book and Catalogue is here.  Please click on the picture of the catalogue to view all the gorgeous products which are now available.  I have several catalogues available, so if you'd like a copy mailed to you ($15.00, includes postage or $12.95 if you collect from me) please let me know.


Colour Renovation Colour Kits

I mentioned a little while ago that Stampin' Up! were introducing several new colours into the product range, and now you're able to purchase these new colours in the form of colour kits.


These kits are a great way to update your exisiting Stampin' Up! prodcuts, without the expense of replacing products you already have.  Just quote the item number of the kit you'd like to order.  Easy.

Receive Free In Colours

During the month of September, join my team by purchasing the demonstrator Starter Kit, and receive a complete set of In Colours absolutely FREE;  that's Classic Stampin' Pads, Stampin' Write Markers, and an assortment of card stock.  That's a total saving of $84.90. Please don't hesitate to contact me to place your order for your Starter Kit.
A New Starter Kit (and it's cheaper)

The starter kit has been reduced to $289 and includes more than $515 worth of products - how good is that?! You can choose from 3 wood mount stamp sets, 1 clear-mount set with a clear block, a Stampin' Around wheel with ink cartridge and handle, inks, card stock, designer series paper, markers, ribbon, etc, etc.  Check out the starter kit below to get an idea of what you can get.  For a full description on what is included in the kit, look at page 8 of the 2010-2011 Catalogue (click on the catalogue above if you haven't received your copy of the catalogue yet).  It's great value!!
  

Enjoy browsing the 2010-2011 Catalogue.  I hope you enjoy all that you see!! 
Happy Stamping!

Wednesday, August 18, 2010


I'm holding a techniques class this Friday (20th August).  This month we are doing the cracked glass technique.  If you are interested in coming along, please give me a call to book your spot (I only have two spots left) - 0419 945 031.  The class will be held at my home at 9:45am and costs $10.  

Hope to see you soon!!

A Note Card

Sometimes you just need a card so that you can drop someone a note.  I made this card for that purpose:

The card s supposed to look like an interoffice envelope or a security envelope, but I'm not sure that it really does???  Also, the picture isn't fabulous (sorry).  I have used a sheet of Windsor Knot dsp and Rose Red cs. Okay, so not my best creation to date......